At Vip Connect, we’ve completely redesigned the content creation process with the new Step-by-Step Post Creator. This intuitive and organised system enhances the experience for administrators by making content creation and management tasks easier and faster.
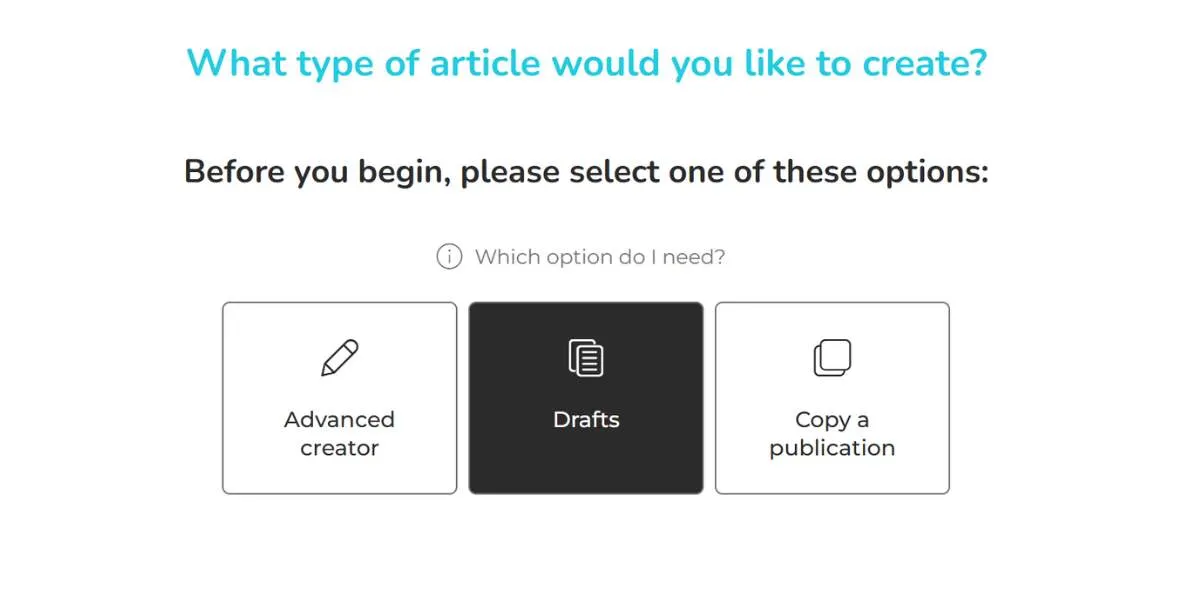
What is the Step-by-Step Vip Connect Post Creator?
This new creator divides the content creation process into clear steps, simplifying each stage and displaying only the configurations necessary for each type of post.
The Stages
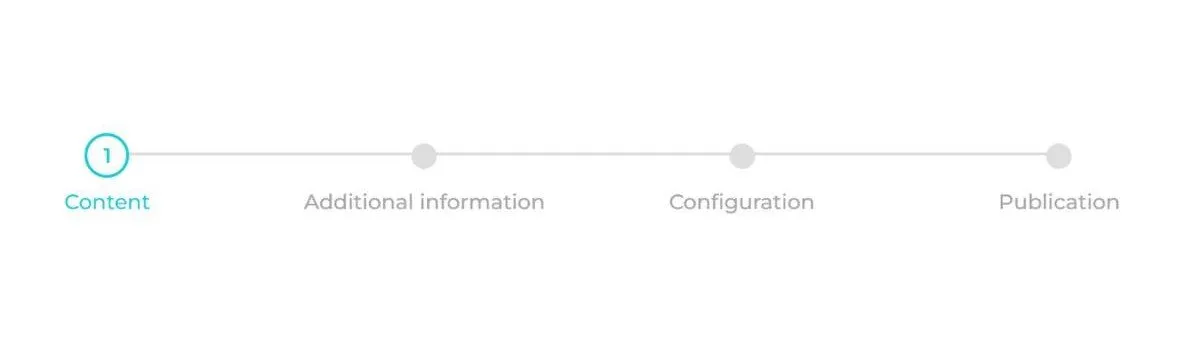
- Content: Definition of the post’s basic elements including title, description, cover image, and more. This step becomes even easier when using our artificial intelligence tool, which helps you create content in a matter of seconds.
- Details: Specific configurations based on the content type. For example, in Activities, registrations can be managed or information about colleagues can be added.
- Additional Information: Enables attachment of supplementary documents to enrich the post.
- Configuration: Establishing the reach, segmentation, and interactions allowed for users.
- Publication: Definition of the post’s status (active, inactive, or draft), scheduling of publication dates, and configuration of related communications.
Streamlined Categories and Subcategories
We’ve applied the same step-by-step system to creating categories and subcategories. In just three steps, you can define the content, configure settings, and publish.
This new publishing workflow simplifies the content creation process, making it a more intuitive and dynamic process. It also reduces the workload for administrators, allowing them to focus on each aspect of the post with ease.
Enhanced Content Management
Copy Posts: Greater Efficiency, Less Effort
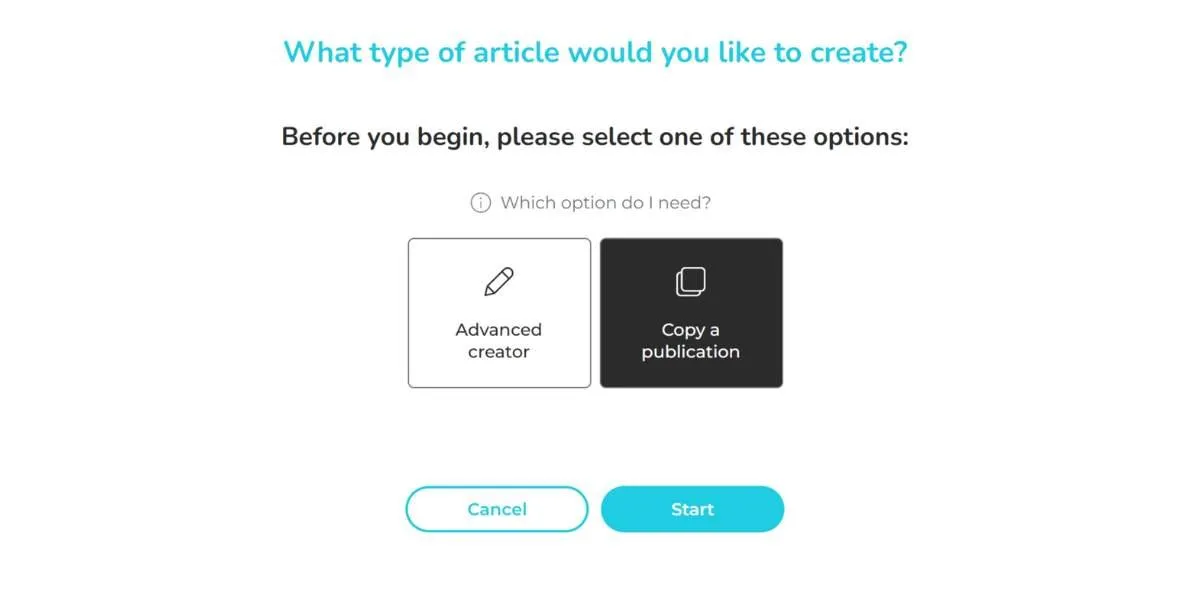
The ability to create new posts by duplicating existing content makes managing similar publications easier.
How does it work?
- From the post: Access the action menu and select “Copy.” The creator will open with all the information copied and ready to edit.
- From the creator: Select “Copy”, search for the post you wish to copy, and proceed with the pre-configured content.
This process is ideal for recurring corporate communications or posts with different segmentations. It is a more efficient and less effort-intensive solution for administrators.
Save as Draft: Maximum Flexibility
With the new save-as-draft option, you can now pause post creation and resume whenever you need to.
How to Save a Draft
- During creation, click “Save as Draft.”
- Enter the draft’s title in the modal that appears.
- On mobile devices, select the “Draft” status from the final step of the creator.
How to Resume or Discard a Draft
- Resume: Locate the draft in the selection modal and continue editing.
- Discard: Manage drafts directly from the modal or delete them from the editing screen.
This evolution of the content management system comes as the result of listening to customer feedback. Together, we’re creating a better platform that delivers the experience our users need.
Want to know more? Reach out or speak with your account manager.